With SOLIDWORKS Simulation Professional, one of the many study types available is Topology Optimization.
The Topology study is a nonparametric optimization of parts utilizing specific goals, manufacturing constraints, and all applied loads and fixtures. These studies provide amazing insight into how forces and other loading conditions are most efficiently supported by their fixtures.
They can show how to reduce the mass of a part while maintaining stiffness or fulfilling design requirements, such as keeping displacement below a specified value or keeping the factor of safety above a certain level. But when all is said and done, how do you utilize the results obtained?
Material Mass Plot
The Material Mass plot is the main result of Topology studies, and shows where material can be removed while maintaining your set design criteria and manufacturing goals (e.g. best stiffness to weight ratio while preserving key faces that mate to other parts).
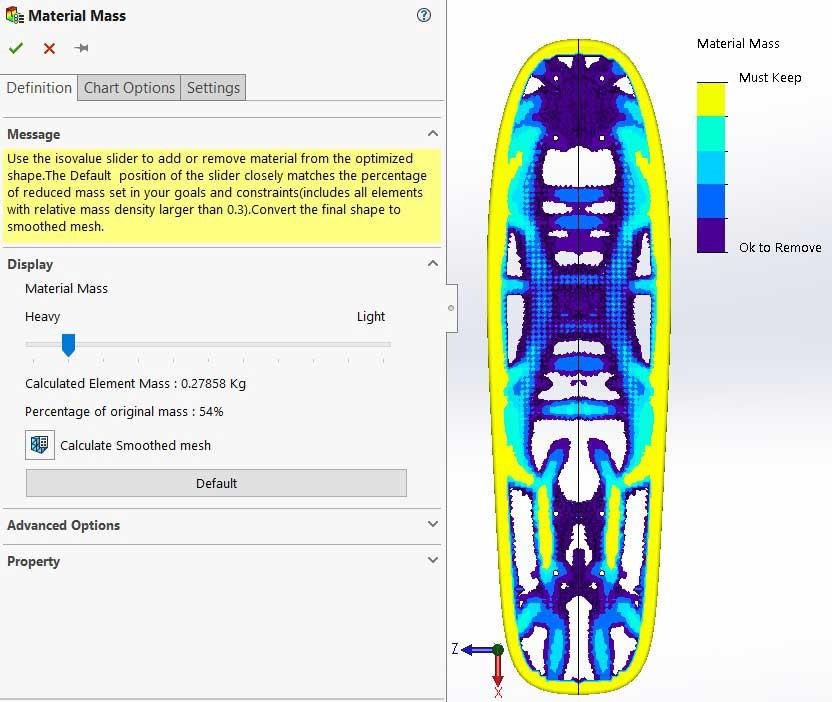
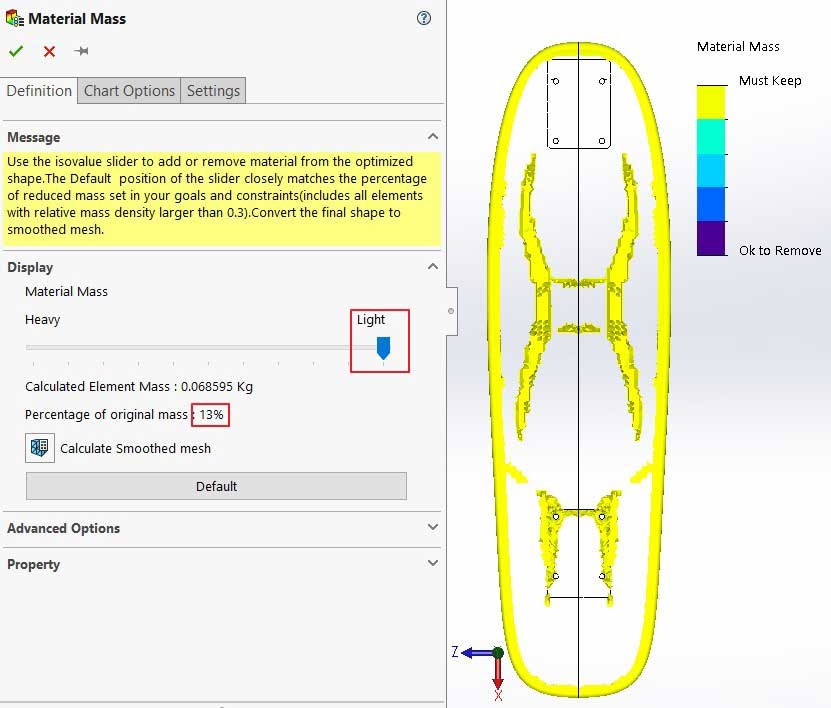
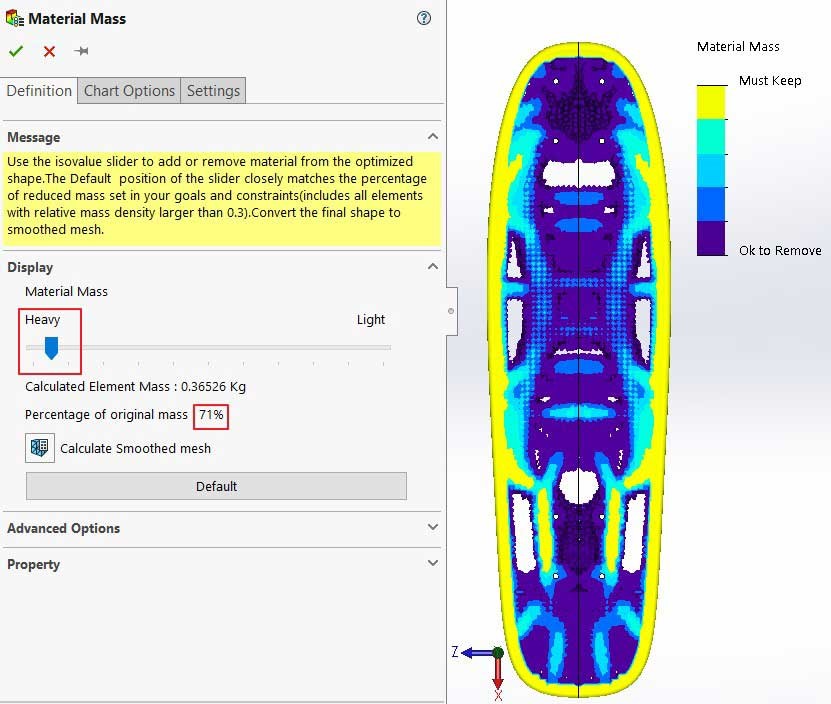
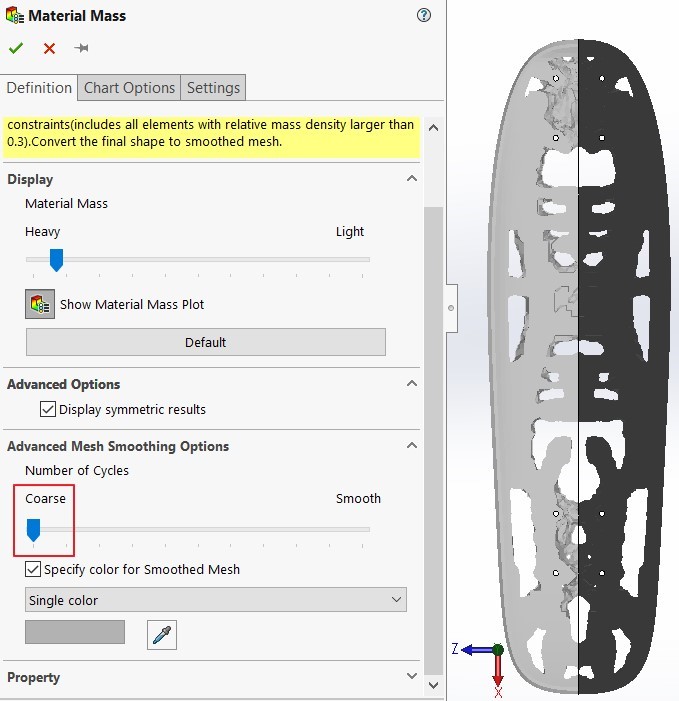
Inside the Property Manager for this plot, you have a slider to specify how “heavy” or “light” to show the resultant topology-optimized part.
Pulling the slider toward the heavy side will increase how much material is left on the part and pulling toward the light side will remove material. The range of values available is dependent on how much material the software was told to remove.
For the images below, I set the software to remove 70 percent of the material so most of the control in the slider is between 13 – 70 percent.
Light
Heavy
Generating the Mesh Body
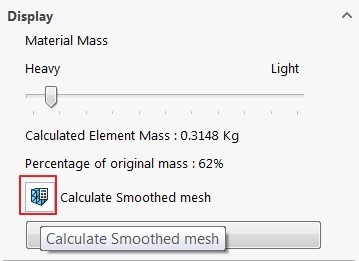
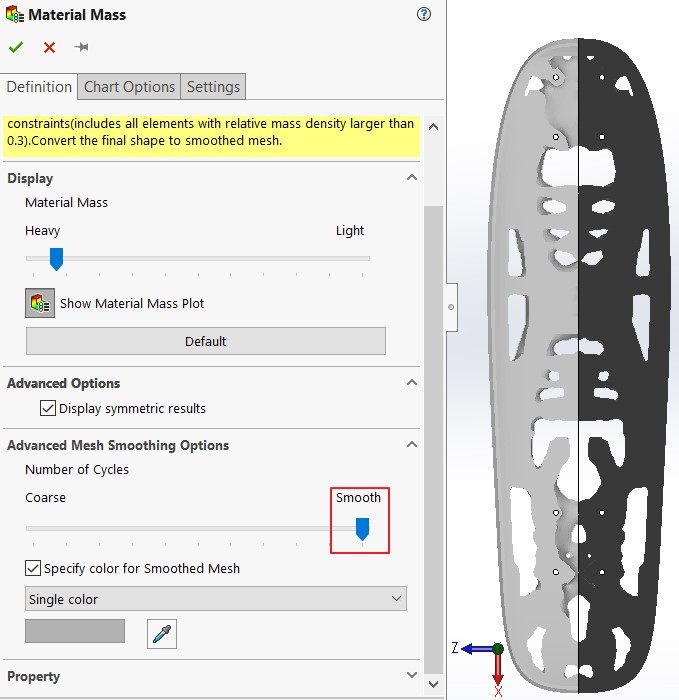
After setting the material mass slider, click on the Calculate Smoothed mesh button. This will generate the mesh body that will later be exported. Generally, I like to move the slider toward the smooth side of the spectrum, but this does remove additional material during smoothing and may remove small details.
Coarse
Smooth
Exporting Results
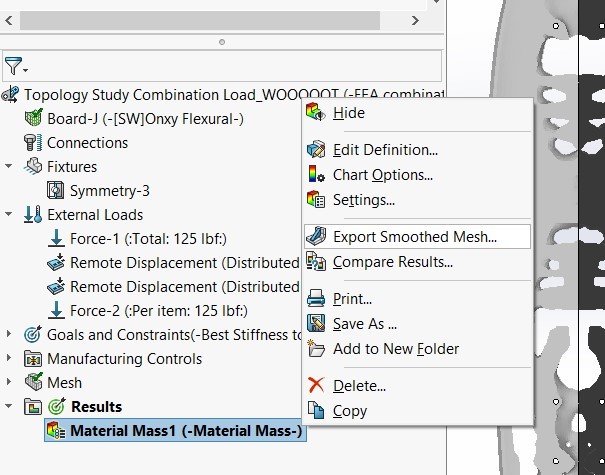
After choosing the level of material and smoothing, click Okay in the Property Manager. Then, right-click the Material Mass Plot in the Simulation Tree and select “Export Smoothed Mesh.”
In the Export Smoothed Mesh Property Manager, you can choose whether you want to export to a configuration or to a new part file. This choice will depend on what you plan to do with the exported body, but remember, configurations do increase file size and mesh bodies (particularly highly organic mesh like this) take a disproportionate amount of system resources and memory when compared to standard SOLIDWORKS geometry.
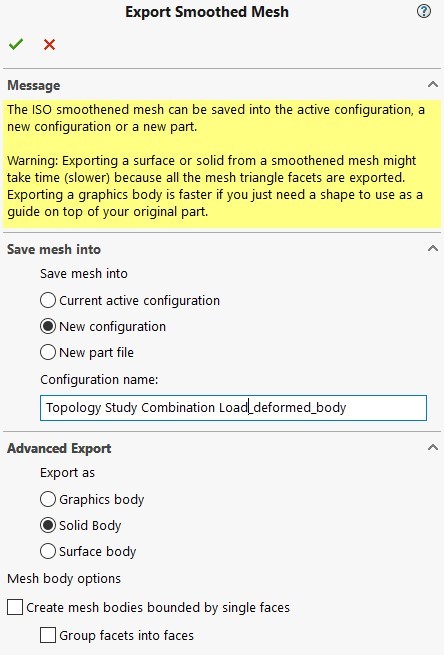
Generally, topology results are used for reference (something like a “3D sketch picture”) when making standard sketches and features. In that case, exporting to a configuration is a good choice, as the body will be added as an imported feature. If you decide to print the results directly, however, then I would suggest exporting out to a new file.
The next option is to export as either a graphics, solid or surface body. This choice will be dependent on what you plan to do with the results. A graphics body is adequate if you are using the results as reference for standard sketches and features. A solid body is ideal if you are planning to print the results. It is also somewhat dependent on the quality of the results and the smoothed mesh—not all results will turn out as clean as the example I’m using here (and may also result in multiple bodies). A surface body is a good choice when using the results as a reference for new features, especially if you need more flexibility than a graphics body provides.
Utilizing the Results
For the skateboard used in our examples, we can try exporting the smoothed mesh to a new configuration and as a solid body. Then I used some of the original sketches and surfaces to help us cut the body into pieces small enough to fit on my 3D printer.
In this article, we covered how to export and utilize the results from a SOLIDWORKS Simulation Professional topology study Control over the resultant body is done primarily through settings in the Material Mass Property Manager, choosing how much material to retain from the original part and how much smoothing will be applied to the mesh. The type of body (graphics, solid, and surface) as well as location to be exported to (a configuration of the original part or into a new part file) is chosen in the Export Smoothed
For technical Support Email: support@logicalsolutions.in
To get more updates on SOLIDWORKS Follow Us on LinkedIn: Click Here
For more details Like Us on Facebook: Click Here
For videos SUBSCRIBE to our channel: Click Here
Get A Quote Today: Click Here